Scan Family Prints for Albums: Capture, Resolution and Review
Plan a photograph scan around the original's condition, the information on both sides and the size at which the image will be used. Capture a faithful record first, make edited album copies separately, and verify the files before returning the originals to storage. A large pixel count alone does not establish a sharp or complete capture.
This guide concerns loose prints that can be handled safely. Bound albums, glass plates, badly curled prints, flaking surfaces and photographs stuck to another object need a different approach. The aim is useful digitization without sacrificing the physical evidence that makes the photograph meaningful.
Choose the capture method from the object
The U.S. National Archives advises checking that an original fits fully on a scanner and avoiding pressure that can crease or crush it. For bound volumes it recommends supported camera copying rather than forcing the binding onto a flatbed. Fragile or valuable originals are not suitable for automatic document feeders.
For an ordinary flat print, a flatbed may be practical. A camera mounted above a supported object can accommodate items that cannot safely lie face down. Neither method is automatically superior: alignment, focus, reflections and the object's condition determine whether the result is useful.
| Object | Practical starting approach | Stop or change the plan when |
|---|---|---|
| Sound, flat loose print | Flatbed capture with the whole object visible | The lid presses on an oversized edge or raised surface |
| Photograph mounted in a bound album | Supported camera copying | The book must be forced open to flatten the page |
| Glossy or textured print | A test capture before the batch | Glare or surface texture obscures important detail |
| Stuck, flaking or damaged object | Specialist assessment | Capture would require peeling, flattening or cleaning experiments |
Calculate the useful sampling target
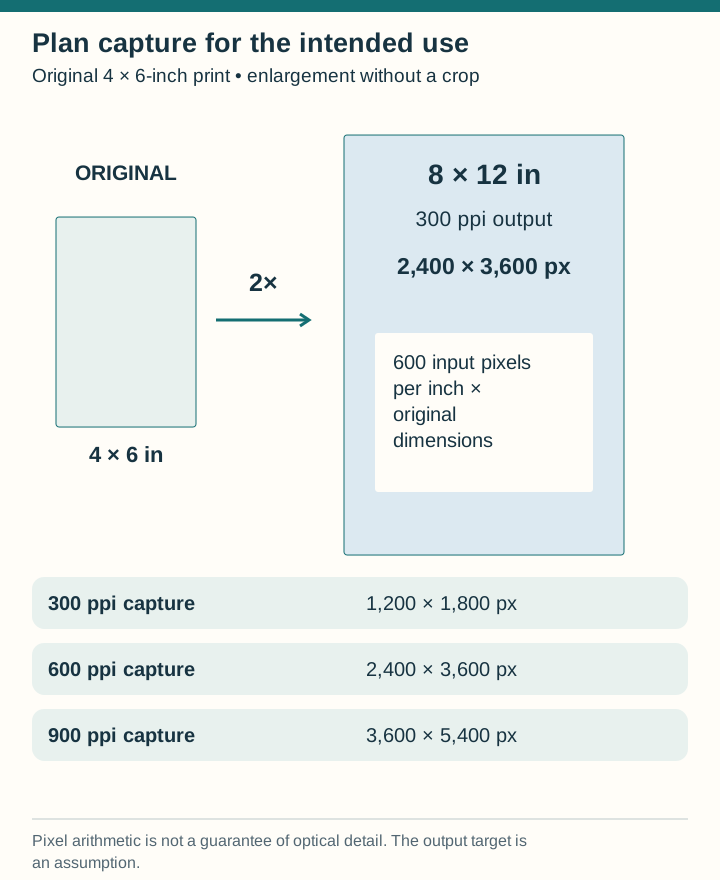
Consider a fictional 4 × 6-inch print intended for an uncropped 8 × 12-inch reproduction. If the receiving workflow requests 300 pixels per inch at that final size, it needs 2,400 × 3,600 pixels. Sampling the original at 600 pixels per inch produces those dimensions before cropping. The target comes from this particular enlargement and output assumption; it is not a universal scanning requirement.
Required input sampling = output pixel density × enlargement factor. Doubling each printed dimension requires twice the sampling per input inch to maintain the same output density. It creates four times as many pixels across the image area, not twice as many.
| Input sampling | Expected pixel dimensions | At 300 ppi output, before cropping |
|---|---|---|
| 300 ppi | 1,200 × 1,800 | 4 × 6 inches |
| 600 ppi | 2,400 × 3,600 | 8 × 12 inches |
| 900 ppi | 3,600 × 5,400 | 12 × 18 inches |
These are pixel calculations, not promises of newly resolved detail. A blurred original remains blurred, and scanner optics may not resolve all the detail suggested by an advertised number. Examine a representative capture at useful magnification and compare the result with the physical print before committing to a large batch.
Adobe's image-size documentation distinguishes changing physical print size from resampling. Changing a resolution label does not create captured detail. If an album crop removes part of the image, calculate the usable dimensions from the remaining pixels, not from the untouched scan.
Capture the object before correcting its appearance
Include the complete image and enough border to show its boundaries. A mount, handwritten margin or unusual cut edge may be part of the object record. Make a separate cropped derivative for the album instead of trimming that information from the only scan.
Capture a reverse that contains names, dates, studio marks or other relevant evidence. Use matching IDs such as P027-front and P027-back. An ordinary blank back may not need its own image for a small home project, but record the capture policy so an absent reverse file is not mistaken for a missed task.
- Keep a reference capture with restrained processing and documented settings.
- Make rotation, tonal corrections and album crops on a separate working copy.
- Record restoration that changes the image content, such as removal of a tear or reconstruction of a missing area.
- Retain the original even after a successful scan.
A color capture of an apparently monochrome print can preserve paper tone, stains and ink distinctions that a grayscale conversion would remove. Whether those features belong in the final album is an editorial decision; preserving them in a reference version leaves that choice open.
Run a pilot with the difficult examples
Choose a small test group that includes a pale print, a dark print, fine handwriting and a textured surface if your collection contains them. Confirm focus, edge completeness and readable inscriptions. For camera work, inspect opposite corners as well as the centre; a sharp centre does not prove the object and camera were aligned well.
Turn automatic enhancement off for one reference test so you can see what the software changes. If a second version improves the album reproduction, keep it with an explanatory suffix. Do not batch-apply aggressive contrast merely because one faded example benefited from it.
Check the result while correction is still easy
Reconcile the expected captures with the files produced. For a fictional group of 24 prints with 9 selected reverses, expect 33 reference captures. If 32 appear, locate the missing item before the originals are packed away. If 34 appear, identify the extra rather than assuming the count proves completeness.
Open each important capture and check orientation, clipped edges, focus and file readability. Keep a short redo list using IDs. A scan can have the right dimensions while showing the wrong object, a reflected lamp or part of a neighbouring photograph.
Connect scans to description and use
Start with the stable identifiers described in sorting inherited photographs. Attach supported information using the caption method, keeping the historical date distinct from the scanning date.
For negatives and transparencies, use the separate film digitization brief; a reflective print workflow is not a substitute for transmitted-light capture. When the album is printed, retain the reference scans and their object records alongside the selected derivatives. The new book is a use of the collection, not its replacement.